Honda Africa Twin Forum banner

When you get too decrepit to ride two wheels would you consider a side car, or something else?

Adventure Hack: Africa Twin Sidecar Story

97K views 464 replies 43 participants last post by  Beowulf  
#1 · (Edited)
So I am not completely ancient, yet (61), but contemplating what 70's and 80's might look like.

Has anyone thought about, seen, or done a sidecar on an adventure bike?

Not a real fan of trikes, but got to thinking that a Twin set up for "rough roads", like the Ural setup, but with a reliable bike, might be amusing.

I would think the Twin has enough HP to remain amusing, and that there would need to be some serious mods (front suspension), frame welds, etc. to make it happen.

What I wonder is how much off-road performance could be retained?

I don't fully utilize the Twin's off road capabilities, but I do like to take it down the road (ok ditch) less traveled sometimes, and would like to still be able to do that.

One last detail: 29 inch inseam and not a big fan of falling over. Been working on skills for the past couple of years, but hitting some limits.

OK: Better image for the thumbnail:

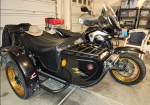
Mine, done, as delivered, 9/22. However as I find, a hack rig is always a work in progress.

Image


Yeah, it keeps evolving... circa Dec 2023
Image


The early stages of this thread are about contemplating and getting a sidecar rig put together for the AT platform.

The middle stages of the thread detail out some pretty rotten experiences with a now defunct sidecar builder and how I corrected most of their skullduggery.

The latter stages document some really fun rides, either by myself, or increasingly with the community of friends that I am making with this crazy rig. Who'd a thought building an off-road capable hack rig would broaden one's circle of friends immensely?

I hope anyone that stumbles across this enjoys it and if you seriously contemplate building a similar rig, PM me. I have made many of the possible mistakes, and continue to make more (although fewer and less frequent!) ;)

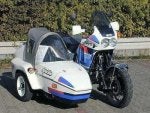
How a friend's turned out, from DMC Sidecars:


Attachments

Discussion starter · #7 · (Edited)
Cool, I would be interested!

Was it DMC sidecars, maybe? Looks like they make mounts and a variety of sidecars that would work on an AT:


So now the thought process:

Would I keep the 2017, low milage DCT that I have owned since new, or buy a new 2022 Adventure Sport, since there are a few bells and whistles on the new bike?

Or switch to a BMW GS, and add a side car?

Decisions, decisions...

Money is not unlimited, but I think I could afford any of those ideas. Just not sure I would enjoy the more expensive options enough to justify the additional bucks.
 
Discussion starter · #16 ·
Found this thread over on Adventure Rider forum, where a gentleman added an Expedition sidecar on from DMC. He put it on a 2016 DCT, and from his videos, looks to have accomplished almost exactly what I would like to accomplish: a nap resistant AT that can go most of the places I would want to go by myself.


I think I will go a similar route. Looks like big bucks, but I think it is what I want.

Tagging @DCTFAN , incase you know any more details; saw you on that thread, as well.
 
Discussion starter · #17 ·
OK, so I am continuing down this rabbit hole, and getting a quote for a custom build. Question for experts on DCT/ABS etc.

My bike is a 2017 DCT. One of the options I am considering to change out both rims for tubeless rims from Woody's Wheels, and use the same rim on the sidecar, thus having one tire size on all three slots, and it being tubeless.

The other alternative is to leave the bike wheels alone, and essentially have 3 tire sizes.

It would be appealing to have the tires all the same AND gain a larger contact patch on the front wheel, by switching them out.

Am I asking for trouble on a DCT, ABS, TCS, ect.? Could I get away with this, with minimal impact on shift points, braking, etc?

The one guy I have encountered that has done this, left his wheels factory sized.

The whole process is blindingly expensive, so I am hoping to get it right, with zero headaches (yeah, that always happens!)

It would suck to pick up the bike after spending close to $20k, to ride a couple thousand miles home, and have the DCT totally screwed up by wheel diameter issues. @DCTFAN, any thoughts?
 
Discussion starter · #18 ·
Well, decided to to do this thing. Pick up a new 2021 ATAS ES DCT Tomorrow to build up a custom Adventure Sidecar for. Even inspite of this little blurb, crafted by Honda's lawyers, from the owner's manual:

"Do not pull a trailer with, or attach a sidecar to, your vehicle. Your vehicle was not designed for these attachments, and their use can seriously impair your vehicle's handling. "

I think there are probably a lot of other things the Honda Lawyers would prefer that I don't do with their products, as well... 😁
 
Discussion starter · #19 ·
Let the adventure begin!

Ok, so this is officially turning into a sidecar build thread. I placed the order with DMC Sidecars in Washington State, this morning. Now the hard part begins: waiting!

This thread contains the discussion on the bike selected:


Pic of the bike, 2021 ATAS ES DCT:

Image
Image


Project basics:

The Expedition SidecarThe Expedition Sidecar (dmcsidecars.com)
Grab handle
Front bumper w LED Light BarBaja Designs
Tow Hook
WARN WinchWARN Industries AXON 35-S powersports winch, 50' of 3/16" Spydura synthetic line, 3,500lb pull capacity. Winch can swap forward or rear facing.
Seat belt
Front steering Leading Link SetupUsing Woodies 18" spoked rims, black on sidecar, bike front, bike rear.
Front shocks delete of Hagon shocks, swap in pair of Ohlins . Note bike has electronic suspension, so will need the delete jumper/module to not have idiot lights flashing on the dash.Off-Road S36 Twin Shocks (CC 718) | Öhlins USA
Sidecar Installation Labor
Paint: Honda Darkness Metallic Black2021 Africa Twin BUILD - Honda
Heavy duty frame/shock upgrade- Delete Touratech sidecar shock?Ohlins s46 Sidecar side Shock
Bike Rear Shock/Spring upgradeAdventure S46 Shock (HO 649) | Öhlins USA
Lead time from order?
Delete bike battery, install large capacity battery cells under sidecar (winch + extra starting power.)Two sealed 6v batteries, in series, lots of amps.
 
Discussion starter · #21 ·
. He bought a AT DCT, but not the adventure sport. I tried to convince him to pay extra for the AS, but he didn't listen to me, and now he is regretting it. I'll try to find out what the companies name is.
@JamesRL1972 , words of wisdom. I thought pretty hard about just converting my 2017 standard w DCT over to a sidecar rig. I finally decided that there were enough features with the ATAS, combined with the slight extra power of the 1100 to swing me over to buying the new bike and customizing the car/bike combo. I am hoping this is something I buy once, and am happy for a long time.
 
Discussion starter · #25 ·
Is there intent to perform some offroad with the sidecar? e.g. Ural-like exercises?
Absolutely... the goal is for it to go places I might not take a 2 wheel bike.

So far, design specs will retain or possibly enhance the factory suspension travel with the combination of Ohlins shocks and leading link front end design. Woody's wheels might be a little tougher than the factory rims, from what I read, at least.

So yes, I want it to be able to go off the beaten path with impunity.
 
Discussion starter · #32 ·
@Beowulf: Which front tire type do you plan to use?
Lacing up some fairly stout Woody's 4.5" x 18" rims all the way around, then will start out with Mitas E07 Dakar tires 150/70 - 18 at all three points. I decided that I like the tread pattern on the back of my red bike, so will use it on front, back, and sidecar wheel, only with the stiffer Dakar sidewalls. Tubeless, of course!

I suspect that there will be some fooling around with the front speed sensor ring, to get the rotational speed difference accounted for after the front becomes an 18" rim. The OD of the 18"E07 is actually with in 2 inches of the 21" 90/90 factory tire, so it may be a non issue. Jay, over at DMC says that he can fabricate a new sensor ring, with the right number of holes to make things work, if we need to do so.

Rear tire size remains the same, so maybe Speedo will be happy, if not, Speedo Healer to the rescue.
 
Discussion starter · #34 ·
So reasonable to assume then no dark-siding? :LOL:
View attachment 67331

Thought about it, but finally decided to stick with bike tires. Still checking to see what is available in something like an 150/80 - 18, for a little more diameter, but will stick with the bike tires for at least the first set.
 
Discussion starter · #35 · (Edited)
Ok, first project activity/update since buying the 2021 AT AS ES DCT for the conversion to a hack rig: Still waiting to transport the bike up to DMC, in Seattle, but thought while I waited, I would add the Eastern Beaver PC8 power panel for the many required farkle power. Also wanted to add an SAE battery tender lead that can act as a power takeoff for a heated jacket liner that I decided was finally necessary, after many years without heated gear.

Thought process:

The rig will have two 6v gel cells in series in the sidecar, to replace the Li Ion battery that is currently installed in the normal battery spot. The factory battery will be deleted, with the battery box essentially becoming a junction box to run heavy cables from the new batteries to power the bike. The gel cells will provide plenty of reserve power for camping accessories and the winch that will be installed on the sidecar, etc. Also provide a little less "dead battery" fear for a DCT that can't be bump started.

I had installed an Eastern Beaver PC8 on my 2017, when new, so was reasonably familiar with the drill. Two main differences, this go around.

1. Bought the version that he calls "Power Link" that gives you a connector that can disconnect the entire accessory panel, and act as a jump start point, should you happen to buy the accessory cable that is designed for that function. I did not pick up that extra-cable, because I will likely put a BMW style jumpstart connector over on the hack, once I get it back from DMC. So for now, the powerlink is just an extra connector that may or may not serve any use in the future.

2. The pick up for the switched power/relay now plugs into the license plate light connector. You can see the tail that has two small white connectors on about a 3 inch strip of wire shown at the top of the photo, below. This plugs into the white connector for the license plate light, then the wire to the lights plugs into the extension connectors. Pretty easy. This is what it looks like, without the powerlink connector between the battery leads.

Image


I also bought the "long" version of the kit, to have the cable length to mount the PC8 panel towards the back of the bike, under the pillion seat. There is a very convenient flat spot on the fender liner where it fits well in this configuration. This spot may have been left from the factory for an alarm or immobilizer device. If you were going to use it for that, then you could install the PC8 farther forward. It would just be a little more cramped.

Next, I removed seat and the rather pathetic little "tool box" to expose the battery and the area to fish the power leads to the battery. I removed the plastic trim by the left side of the seat, as well, for a little more visibility. Hindsight says that this was not really necessary, but maybe it made it a little easier to feed the wires behind the frame, down to the battery holder.

Image


Since the battery will be deleted in the very near future, I did not bother with 90 degree cable ends that might have made it easier to retain the tool box. I just pulled the "box" portion of the hinged plastic off, and stowed it away. The "lid" portion bolts to a couple of points, and provides the appropriate cosmetics. Incase you were wondering, the battery box is not a sealed unit to begin with, so swim with caution.

Below is what the "Powerlink" connector looks like, prior to plugging the rest of the EB PC8 harness into it.
Image


Pic showing the relay (that I later unbolted, since it interfered with the seat), and the two main fuses for the switched and unswitched power circuits. I kind of wish he would have made the unswitched circuit the same wire gauge as the relay circuit. It would have made jumpstarting through this circuit a little less chancey.

30 amp fuse for the relay circuit, with heavy (maybe 12 awg wire.)

20 amp fuse for the unswitched circuit, with maybe 14 awg wire.)

You can also see the SAE plug that I added in for the heated jacket connection, towards the bottom of the pic.
Image


PC8 circuit board, prior to installing fuses. Perhaps it would have been better to come into the PC8 with power and ground from the other side, but such is life. I picked this orientation for some level of convenience in cable routing.

Image


1. Frame ground for SAE connector for heated jacket connection (yeah, there is a star washer under the connection tab.)
2. 15 amp fuse on heated jacket SAE plug.
3. Hot side of SAE connection, on BAT Terminal coming into PC8 (always hot.)
4. Hot wire, fused 20 amps, from BAT, feeds (2) unswitched fuse circuits.
5. Hot wire, fused 30 amps, from Relay, feeds (6) switched fuse circuits.
6. Ground wire to Bat negative
7. Negative connections available from PC8 for individual circuits
8. Positive connections available from PC8 for individual circuits

Note: Fuse values installed in the panel are mostly random, at this point. Correct values for accessories will be swapped into to the individual circuits, as they are used.

Image


Finished, prior to seat reinstall.

Image


At this point, I called it a day, and went for a ride.

I contemplated installing my newly acquired Scott X series oiler, but couldn't find a super convenient place to hang the reservoir, so decided to defer that installation until luggage rack or maybe a sidecar mount magically appears and solves that issue. Worst case, the left passenger foot peg mount has some potential, but it was hard to get excited about that location.

So now the bike is "ready" to go up north for the sidecar build/install. It also has convenient power for heated gear, while I ride it around the mountains in anticipation of it's departure.

So this PC8 install isn't strictly sidecar related, but it is the first step in this AT's journey to becoming a hack rig. I hope the pics are of use to anyone wanting to put a PC8 on a post 2020 ATAS. The Eastern Beaver site instructions are pretty much non-existent, so maybe the pics will help someone.
 

Attachments

Discussion starter · #37 ·
Baby steps... So got 800 miles on the new bike for the tug. Decided to get an oil/filter change done on it, just in time for it to head north to Seattle. Wanted it done, so if the stars align, I can ride it back to Arizona after the build is complete, with that already taken care of.

Also removed the bash plate and it's mounting brackets, since it will not be used in the build.

Items of note: I think Godzilla installed the factory spin on oil filter. In about 50 years of wrenching on almost all brands that roll the earth, I have not had one stuck on so badly. Thanks Uncle Soichiro! I had the correct wrench, and it just rolled the corners in on the factory filter. I finally had to resort to a big pair of channel-lock pliers to deform it and twist it off. Sheesh...

Replaced DCT filter, as well. No drama.

Some pictures below, incase anyone a has not pulled their bash plate off on an 1100.


Removed plate and the bracket it attaches to on the upper left...
Image


New oil filter is not torqued to 100 ft lbs!
Image


Dual drain plugs... looks like the oil pan could be removed without taking the engine out of the frame. Now there is an oddity for Honda.
Image


Left the little part of the bash plate that acts as a heat shield on the exhaust in place. Sidecar frame will replace factory bash plate, though.
Image
 
Discussion starter · #39 ·
Next minor update: The 2021 ATAS is now on its way up to DMC Sidecars in Seattle. Jay mentioned he is now doing 3 in parallel, and has this will make a total of 9 Africa Twins that he has fitted with sidecars.

Almost had a tear in my eye, watching that bike leave for what will be months...

Happily the 2017 is still in the garage to make me smile again, today, on a ride out in the desert!
 
Discussion starter · #42 ·
Great video! Thanks for posting it!
 
Discussion starter · #43 ·
Just saw this one up on Craigslist:


Would definitely have explored it, if mine was not already in work, at the same builder. Spoke with the seller; he is selling it for a friend whose wife evidently wasn't compatible with it.

Here are some pics to imortalize it, after the CL ad gets taken down:

Image


Image


Image


Image


Image
 
Discussion starter · #46 ·
I did a leaning sidecar. Had the same problem getting the rig and I grossly underestimated the build. Took an extra year to build. I did the build myself after buying the car and frame. I had to build a subframe for it to mount to, had the tub and frame lineX’d with the top half of the car painted to match my bike.

I was intending to ride to Alaska last summer with my dog but my dog stepped out when the lash point released (I think the vibration and my dog stepping on it allowed it to come out). My dog dislocated her elbow but was otherwise fine. She was wearing Doggles which were completely destroyed but she only had a tiny cut on her eyebrow. Literally worked like a helmet and saved her head.

A leaning sidecar has some extra complication, the big one is the suspension reacts to the sidecar. My bike was starting a death wobble at freeway speeds. I have since added a steering damper, progressive springs on the front, a progressive and adjustable rear shock with a taller stance and it has made it rideable, but it is a different beast when riding.

The main advantage is there are only two mounting points and a power cable: makes it easy to take on and off so I still have a proper Africa Twin for off-road trips. It isn’t so easy to do that I would take it somewhere and drop off the sidecar but with my garage tools it’s about 15 minutes on or off.

Congrats on your build! It is quite the adventure in building a trike and you did a more stable option. I had wanted to avoid changing my tires but that didn’t avoid problems on my end.

One other note, I mounted a hammock stand that folds away to put a hammock tent on the sidecar. It allows me to sleep in “trailer only” parks, have options in marshy areas (Alaska has a few) and I still have a ground tent that easily packs.

View attachment 71195
View attachment 71197 View attachment 71195 View attachment 71196 View attachment 71197
View attachment 71196
Nice looking rig! The LineX looks great for keeping paint chips down to a minimum.

I contemplated a "leaner," but decided I might like the fixed mount for more off road. Time will tell.

I did not spec in a steering damper, but may add one if it seems appropriate. Not a fan of death wobbles; had an ancient Kawi H2 that specialized in them!

I like the idea of a hammock stand, sounds very practical. Would be nice out in the AZ desert.

My build keeps getting delayed; wheels are the current hold up. Woody's is experiencing supply chain delays that have had my rims back-ordered since January. I am trying to wait patiently...